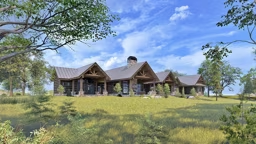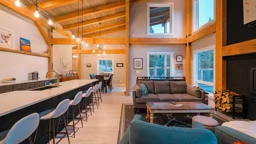


Although custom designs are one of a kind, they do deal with certain recurring conventions: open flow, windows with a view, tall ceilings, few hallways, great rooms and more. By familiarizing yourself with these standard features, you’ll gain confidence about arranging them to suit you. This section will lay the groundwork for your design and offer insight into dealing with design professionals.
1. Visualize your home.
Imagine yourself living in each room of your home. How will it look and feel? What will you see in front, behind, above and below? What sounds will you hear?
2. Show, don’t tell.
Give your designer a notebook of clippings (or images saved to your computer or tablet) of homes and features that speak to you so he’ll have an idea of what you want your home to look like and an indication of the quality you expect.
See also 10 Questions to Answer Before Building a Timber Home
3. Chart your lifestyle.
Consider your family makeup (adults only, adults and kids, aging parents), how you live (formal or casual, hectic or relaxed) and whether you like to entertain or have special hobbies. For example, a casual couple won’t need a formal entryway or dining room, whereas high-octane families should consider cozy, peaceful spaces to regroup.
4. Size things up.
Bigger isn’t always better. It does cost more, though. Before you waste space, make sure the number, type and size of rooms reflect what will take place in them. Think of your rooms in terms of activities: Instead of “kitchen” and “living room,” think “cooking” and “family time.” Some experts recommend downsizing square footage by as much as 30 percent and putting the money saved into higher quality materials.
5. Map out a plan.
Identify access points for vehicles and pedestrians, then within those boundaries, determine the shape of the house and direction it will face. Use your list of activities to position rooms. Start by breaking down your list into private and communal activities and identifying where each one should take place. Then use bubbles to represent rooms and group them according to where you prefer they be positioned. Finally, square off the bubbles to create a rough floor plan, adding enough space for walls.
6. Account for extras.
Architectural components are integral to your home, but they can hog space and cost money, so don’t forget to figure them into your budget. Some popular elements: window seats, large windows, massive trusses, dormers and hipped or gabled roofs.
7. Compromise.
If you can’t afford everything you want, make cuts that work for your lifestyle, whether it’s shaving off square footage, minimizing special features or reducing quality. (Be careful with lower-quality items; some things you shouldn’t skimp on, like windows and doors.)
8. Customize a stock plan.
Instead of starting from scratch, look at your timber company’s standard plans for ones you can tweak to fit your lifestyle and home site.
See also A Timber Frame Fire Tower
9. Talk it out.
Professional advice is crucial throughout the entire home-building process, but this is your home, so make sure you discuss every suggestion thoroughly. And don’t be afraid to get a second opinion if you have concerns. Also, you want to work with someone who’s as excited about your project as you are.
Get the Lay of the Land
Comfort, enjoyment and safety are the primary reasons for building any home, so where you position it on your land should offer protection from the elements. Once you’ve determined this position, you can devise a strategy to take advantage of Mother Nature’s positive side and shield yourself from her negative elements.
First, spend some time with your land. Walk on it, sit and listen; get to know the plants, animals and minerals. Show up at different times of the day (and year) to mark the rising and setting of the sun, turning of the seasons and weather patterns.
Then, ask neighbors how they prepare for the changing seasons, what they find most memorable about the weather, the available daylight and the natural events that occur. Part of this is also learning about the geology of the place, the extent and flow of your watershed, and the quality of the air. Once you establish a basic construction area, you can get down to determining which direction it will face. The first things to consider:
Access points
Establish the best approaches for both vehicles and pedestrians.
Footprint and orientation
Figure out the basic shape of the house and the direction it will face. This is the time to consider the benefits of passive solar design. (Orient the longer axis of your home east/west so the longer dimension faces sunny south.)
Room placement
Your frequently used rooms go on the side of the home facing south. Rooms that require little heat and light (utility rooms and garages) should go on the cooler north side. Also, consider what rooms should have a view.